点击按钮跳转至开发者官方下载地址...
IP Cam Config lets you use your Mac to connect supported "Windows Only" Ethernet and WiFi network IP cameras to your local network.
+ Overview +
One of the ways to get the most out of our popular iCam mobile app is to set up a number of WiFi network IP cameras around your house so that you are not just limited to monitoring the room occupied by the computer. One issue for non-Windows users is that the majority of the more "reasonably-priced" WiFi cameras officially only support Windows.
What most users don't know is that you can still connect to and view these cameras from a non-Windows device once they have been configured to connect to your local network. The problem is that the configuration applications included with these cameras are often Windows-only.
If you do not have a Windows computer at your disposal to run the camera manufacturer's configuration application then the simplest alternative solution is to use IP Cam Config to configure the camera to connect to your local network.
+ What cameras are supported? +
IP Cam Config has been tested as being compatible with the following AirLink101 network IP cameras:
- SkyIPCam1500W
- SkyIPCam1747W
- SkyIPCam500W
- SkyIPCam747W
- SkyIPCam500
Cameras from other manufacturers (such as TrendNET and DIGITUS, for example) seem to share the same internals as the AirLink101 cameras that we tested, so they should also be configurable with IP Cam Config.
As more specific camera manufacturers and models are confirmed to be working with IP Cam Config we will also be adding those to the list.
+ How To Use IP Cam Config To Configure A Network IP Camera +
To configure a new network IP camera using IP Cam Config simply follow the installation instructions included with the camera, substituting IP Cam Config for the manufacturer's configuration application.
Once you have connected the camera to your local network router via an Ethernet network cable, power up the camera and wait approximately 30 seconds for the camera to start up before launching the IP Cam Config application.
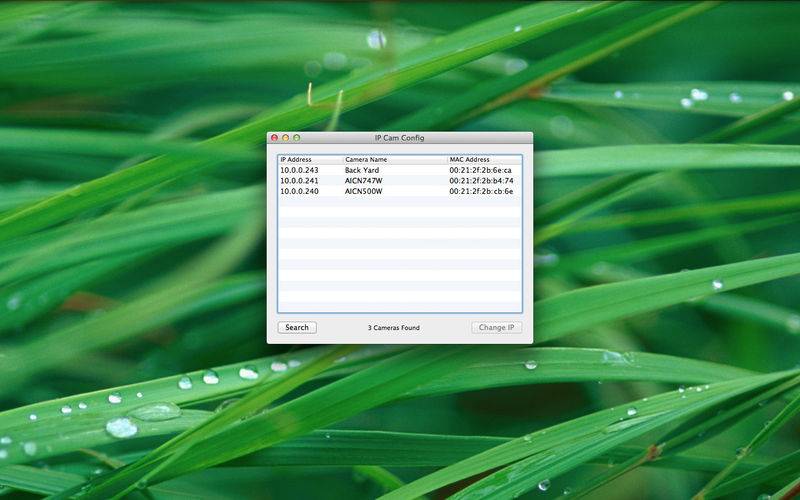
When you first launch IP Cam Config, the application will scan your local network to find any compatible network IP cameras. Once the app has finished searching, select which camera you would like to configure, and assign it either a Static IP address or let your router assign the camera one automatically via DHCP. (Don't forget to enter the camera's Administrator Login and Password, which are usually both "admin" by default.)
Once the configuration has been changed your camera should restart and you should be able to connect to it using its newly assigned IP address within about 30 seconds or so.


